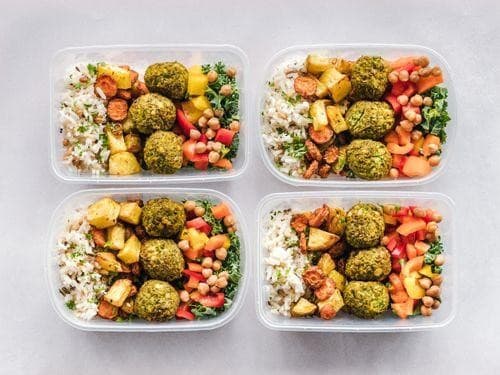
Does the question “What’s for dinner?” bring on a wave of anxiety at 5:00 PM? Many people find themselves opening the fridge, staring into the “abyss” of ingredients, and ultimately opting for calorie-laden takeout because they forgot to thaw the chicken or simply lack a plan. Learning how to create a meal plan is the single most effective way to eliminate this stress, stay on track with health goals, and significantly reduce food waste.
The Benefits of Strategic Meal Planning
Meal planning is more than just a list of recipes; it is a map for your week. By investing a small amount of time upfront, you can enjoy several key benefits:
- Cost Savings: Planning prevents “impulse buys” and helps you avoid purchasing ingredients you already have in your pantry.
- Weight Management: Home-cooked meals allow you to control portion sizes and limit the added sugar, fat, and sodium often found in restaurant food.
- Reduced Stress: Knowing what you will eat for the next several days eliminates last-minute decision-making and rushed preparation.
Step 1: Audit Your Schedule and Set a Time
The foundation of how to create a meal plan is consistency. Set aside approximately 30 minutes once a week, perhaps on a Friday evening before your weekend shopping trip, to focus entirely on your menu.
Before looking at recipes, check your calendar. Note any late work meetings, children’s sporting events, or social obligations. These busy evenings are perfect for “dump-and-go” crockpot meals, sheet-pan dinners, or designated “leftover nights.” You do not have to cook seven brand-new meals every week; keep it simple, especially when starting out.
Step 2: Select Your Recipes and Check Your Inventory
Once you know which nights you actually need to cook, begin selecting your recipes.
- Theme Your Days: To make planning easier, many families use themes like “Meatless Mondays,” “Taco Tuesdays,” or “Stir-Fry Fridays.”
- Shop Your Pantry First: Before adding an item to your list, check your fridge, freezer, and cabinets. If you already have the lentils or rice needed for a recipe, cross them off your shopping list immediately to prevent duplicate purchases.
- Use the Plate Method: Aim for balanced meals by filling half your plate with vegetables and fruits, one-quarter with healthy protein (fish, poultry, or beans), and one-quarter with whole grains.
Step 3: Utilize Modern Tools for Automation
If the manual process feels overwhelming, diet plan generators like Meal Planner Pro can build a nutritious meal plan in seconds. These tools allow you to input your specific profile, including age, weight, and activity level, to generate a plan that hits your exact macronutrient and calorie targets.
Meal Planner Pro can also filter for food allergies (like dairy or gluten) and allow you to adjust for weekly variety. If you prefer more repetition to save on cooking time, you can set the “simplicity vs. variety” toggle accordingly. These digital assistants automate the creation of your grocery list, ensuring you only buy exactly what is needed for your planned meals.
Step 4: Mastering “Meal Prep” Day
“Meal planning” is the schedule; “meal prep” is the action. On your designated prep day, focus on the tasks that will save you the most time during the week:
- Long-Cook Items First: Start with proteins (chicken, fish), whole grains (brown rice, quinoa), and roasted vegetables, as these take the longest to finish.
- Multi-task: While your grains are simmering, chop fresh fruit, wash salad greens, or prepare a sauce for a later dish.
- Batch Cooking: Always consider making extra portions to freeze for a different week. Be sure to label and date everything in your freezer so you can track when to use it.
Step 5: Repurpose and Store Correctly
Successful meal planning often involves repurposing leftovers into entirely new dishes to avoid “food boredom.” For example, leftover roast chicken from Monday can be added to rice and frozen vegetables for a quick fried rice on Thursday.
Proper storage is also vital for safety and flavor. Most cooked whole meats and stews will last 3–4 days in the refrigerator, while hard-boiled eggs can last up to a week. For long-term storage, most cooked poultry and meat can be safely frozen for 3–6 months.
By following these steps, you can transform your kitchen from a source of stress into a streamlined system that supports your health and your wallet. The easiest way to get started is through guidance from apps like Meal Planner Pro that take all the grunt work out of how to create a meal plan. If you have specific medical goals, such as managing a new diagnosis, consulting a registered dietitian can provide further personalized guidance for your planning journey.